Shop Ingredients
How this works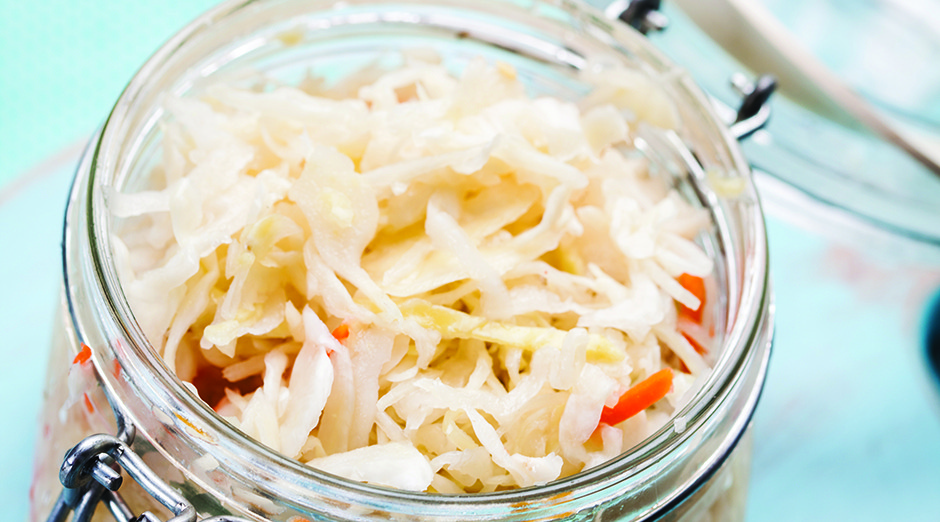
Servings: 1 gallon
Ingredients
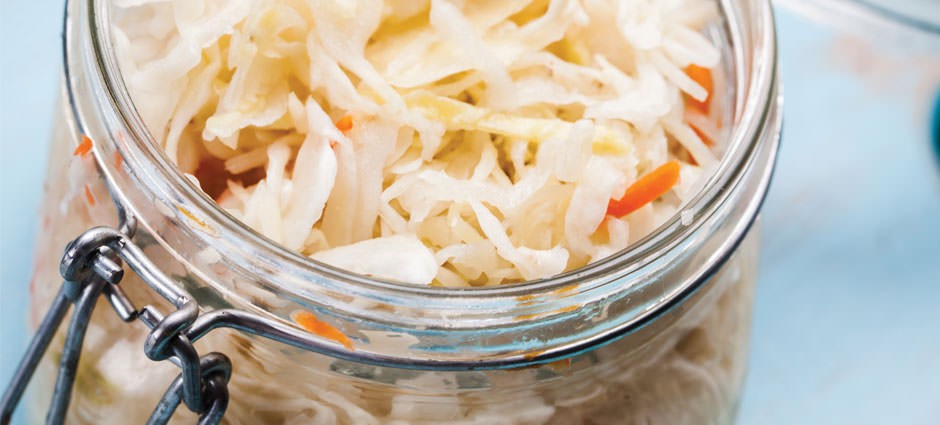
- 5 pounds shredded green cabbage
- 3 tablespoons sea salt
Instructions
- Rinse cabbage in cool water; transfer to a large bowl. Add half the salt and, with your hands, massage it in (as if you were kneading dough), then taste. You should be able to taste salt, but it should not be overwhelming. If it’s not salty enough, continue adding small amounts and tasting, until it’s to your liking
- Cabbage will look wet and limp. Depending on the amount of moisture in the cabbage, some liquid will pool in the bowl. If you’ve put in a good effort and don’t see much brine, let cabbage stand, covered, for 45 minutes, then repeat the massage.
- Transfer cabbage to a crock or jar. Press down on cabbage with your fist or a tamper; this will release more brine. (Don’t worry if brine “disappears” between pressings.) If not, return cabbage to the bowl and massage again.
- When you pack the vessel, leave 4 inches of headspace for a crock, and 2 to 3 inches for a jar. (Headspace is the area between the brine and the top rim of the vessel.)
- Top cabbage with a bit of plastic wrap. This primary follower keeps the shreds from floating above the brine.
- Top with a secondary follower and weight. For a crock the follower may be a plate that fits the opening and nestles over as much of the surface as possible; then weight down the plate with a sealed water-filled jar. For a jar, you can use a sealed water-filled jar or ziplock bag as a follower-weight combination. Then cover it all with a large kitchen towel or muslin.
- Set aside the jar or crock on a baking sheet where you can keep an eye on it, out of direct sunlight, in a cool area (anywhere between 55 and 75°F; the cooler, the better).
- Check daily for 2 weeks to make sure cabbage is submerged, pressing down as needed to bring brine back to the surface. You may see scum on top; it’s generally harmless, but if you see mold, scoop it out.
Using a clean, nonreactive utensil, remove some of the kraut and taste. It’s ready when:
- It’s pleasingly sour and pickle-y tasting, without the strong acidity of vinegar.
- The flavors have mingled.
- The veggies have softened a bit, but retain some crunch.
- The color is that of the cooked vegetable.
If it’s not ready, rinse the followers and weight, put everything back in place, and continue monitoring the brine level and watching for scum and mold.
When kraut is ready, skim off any scum on top, along with any stray bits of floating vegetables. Transfer kraut into a jar (or jars) if you fermented in a crock. If you fermented in a jar, you can store the kraut in it. Leave as little headroom as possible, and tamp down to make sure the kraut is submerged in its brine. Screw on the lid, then store in the refrigerator.
Notes
Excerpted from Fermented Vegetables by Kirsten K. Shockey and Christopher Shockey, photography by Erin Kunkel, used with permission from Storey Publishing. Photo by Erin Kunkel.
Tried this recipe?Mention @WPRecipeMaker or tag #wprecipemaker!
Rate This Recipe
Share this Post
DID YOU MAKE THIS RECIPE?
Leave a comment below and share a picture on Instagram with the hashtag #livenaturallymagazine


Comments